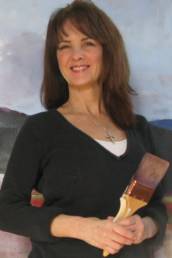
In this demo, American Impressionist Romona Youngquist shares her 7 steps to create a huge landscape painting.
Romana is one of today’s premier landscape painters. Petite in stature, she is known for her oversized, atmospheric landscape paintings. But don’t let her size fool you, Romona believes the canvas is a ‘war zone’.
She attacks the painting with her weapons of choice including sandpaper, brush ends, palette knives, and rags. The canvas endures many layers of scraping, wiping out, and glazing before the battle between woman and canvas is over.
In the end, the viewer is left with an exquisite, mood-filled painting that harkens back to simpler days.
Tackle your own big painting with these manageable steps.
-
Step 1
Before starting a big painting make sure you have a scene you’re excited about.
Work out your scene first with studies, photos, sketches. Mistakes in small paintings are sometimes overlooked but small mistakes in big paintings are magnified.

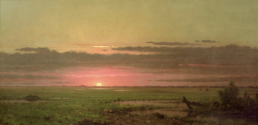
I divide my canvas into a simplified golden section with thirds. X marks the spot of the center of the canvas.
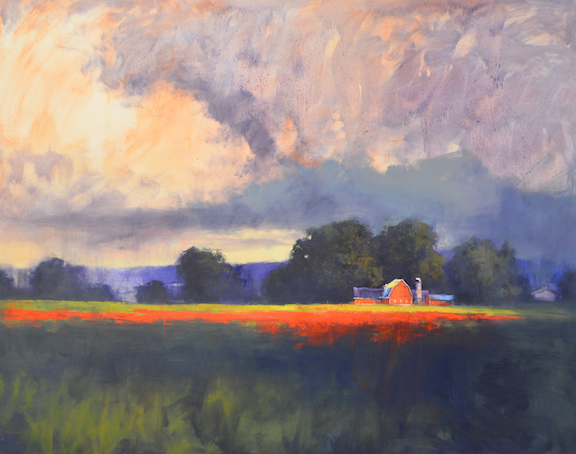
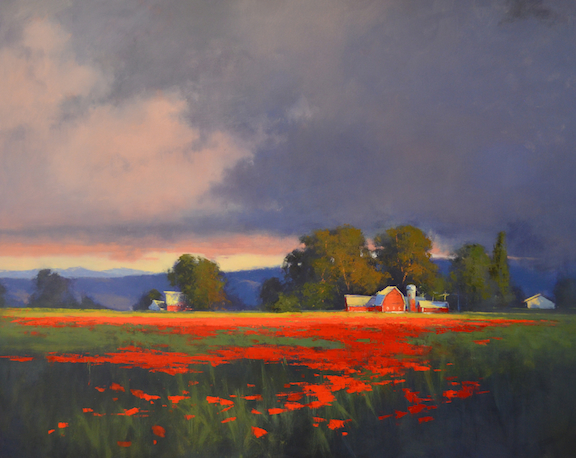
Then decide my horizon line and my main focal point. Before painting, I ask myself, what do I want to say with this painting? With Poppy Farm, I wanted the quiet drama of a stormy afternoon.

-
Step 2
Start painting the masses with dark abstract shapes with the four basic value planes: To learn more about the 4 Value Planes read the amazing landscape painting book by John F. Carlson.

- The Sky – the source of light is the lightest.
- The Ground Plane – reflects the sky, it is the second lightest.
- Slanted Planes – mountains, slanted rocks, hills, etc get less light.
- Upright planes – trees, buildings and other upright planes get the least amount of light falling directly on them.
Squint down to see the masses and values. Washes are a simple thinned out transparent red earth and ultra m blue. Now, step back to see what’s going on. With a flat brush dipped in thinner, I’ve wiped out the light of the barn and out buildings and defined the shapes of the trees more along with some of the far mountains – remembering to keep it simple and abstract.
-
Step 3
The Drama starts.

Lay in the foreground shadow with a cool green and the warm up a lift greenish yellow closer to the barn. This is where I start to define the trees using a dark rich green underneath with a lighter and warm on top. When I mix my colors, I try to add all the colors I’ll be using on my palette – this will make for a harmonious painting. I start to add color to the barn and foreground. The trees get more dark in the shadows, and lighter on top.
I’ve learned far more from my mistakes than my successes. Happy mistakes are a blessing in disguise. ~Romona Youngquist
-
Step 4
Thicker paint! The fun part. Then I scrape into the barn tree area my palette knife. and with my big brush. I will frequently deconstruct. I think it makes things more interesting and it’s fun. I’m keeping the painting soft and simple but also leaving hard edges close to the focal point.
Step back and squint
Tip: Use big brushes until the end (except for wiping out the delicate light areas) it really keeps me from poking at the painting which can kill it quick.
-
Step 5
I’m working color all over the canvas at this point. For the poppies, I see them in a mass and define a few closer to the end and keeping it simple.

My paint mixture is getting more opaque and concentrating on values. My paint application is getting thicker but I’ll still scrape and wipeout to soften edges, and then work more paint on top of the scraped areas.
-
Step 6
Now I’m winding it down. I’m using my smaller flat brushes and palette knife more, adding details. The sky is really simple blocks of dark, medium and light values. I actually remember studying a scene like this in Oklahoma when I was 5 or 6. I noticed how dark the sky was and how it made the tops of the trees glow. And as dark as the clouds are the value of the trees are way darker. This has always fascinated me. I must have been a very strange kid?

Tip: Take a pic at this stage and transfer to your iPad. I love to take a break and study what’s going on with the painting. It helps to distant ourselves and see what’s working and what isn’t.
-
Step 6
Coming to the end!
I’ve refined shapes, intensified the focal point, made a few poppies pop but mostly keep them an abstract shape. I’ve pushed thickness of paint, texture, value, contrast and hard edges. After it’s dried I’ll lightly sand and glaze in some warm tones made of transparent red earth. Poppy Farm 48″ x 60″ is done!
*If you liked this demo, please check out my book Fine Art Tips! It is filled with demos by 24 of today’s finest artists. Available in the North Light Shop or on Amazon.
*****
Many thanks to my good friend Romona for sharing her inside tips to painting a HUGE landscape painting! Please take a moment to view her wonderful paintings on her website. I hope she has inspired you to give it a try sometime. ~Lori
*You can find more great tips on Fine Art Tips Facebook Fan Page, on Twitter, Google Plus, and on Pinterest. Be sure and check out and my fine art prints and notecards on Fine Art America. Check out my website, LoriMcNee.com. ~Lori
Excellent (to the point) demonstration. Thanks for sharing.
Thanks for the feedback Marie! 🙂
This is great tutorial! Thank you Romona.
I have a question for you though, Romona and Lori, if it’s ok. What would you say is the biggest difference between a plein air painting and a studio one? If you take a plein air study into your studio to make it a studio painting, apart from the size, what is the area that you would concentrate on to make it “better” than the plein air? Because, if the studio piece isn’t “better”, whatever it means, than the plein air piece, then there is no point, right?
Hi Lucy, I just noticed I never responded to you question here. I am so behind, so please forgive me. Plein air paintings are quick studies that are recorded outside on location. The artist usually takes photos, sketches and painting studies back into the studio then makes a larger studio painting from all the reference. Some artists will rework plein air paintings, others won’t touch them once again because they want to capture the moment on location. It is personal preference. I hope this helped!
How are things?
Like your Attitude & Sharing each of the steps with the 6 Photos. Addressing the good point made by Lucy Chen, Carlson did advise my teacher Emile A. Gruppe when he studied under Carlson to ” take it a little further & finish it up in the studio”. Carlson, however would still be considered a “plein air” master. Nevertheless, the truth that drove you to set up outdoors, can never be improved indoors and should be left alone. I am always excited to look at the wonderful Quirks of Nature painted truthfully out-of-doors in a smaller painting,than I am to look at a larger work that smells of the studio. We probably ( if we work hard for a long time) only paint a few real masterpieces anyways; and I’m sure some were painted inside the studio and others out-of-doors. Good work and Regards, Thom Joyce, Irish-American painter
Hi Thom, thanks for sharing your insights and for reading the oomment thread. My apologies for the belated reply. I can barely keep up with it all! I also admire Carlson’s work. I agree with the ‘masterpiece’ ratio. It is a rare painting. Thanks!