A while back, a reader asked me to share some tips for painting water and the sun reflections at sunset. Like many, this new painter has been a bit intimidated by depicting reflected light on water.
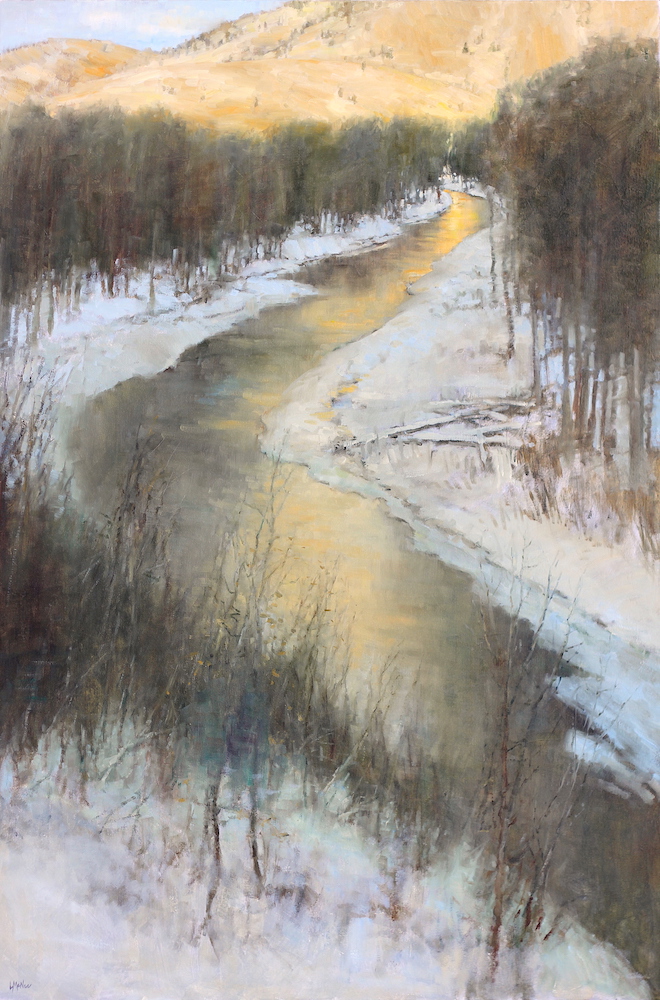
Painting water is a fairly complex subject. With careful observation of Mother Nature, you will notice how water, is affected by its surroundings, reflections, depth, and clarity.
Painting rivers, lakes, ponds, and oceans can be a challenging task. I hope the following tips will help you.
Understanding Water
Different Bodies of Water:
Make sure that you consider the differences between rivers, lakes, oceans, and puddles before you start to paint them. A general understanding will help you recreate them with greater ease.
-
Ripples combine the reflected colors from light and dark areas.
-
Use quick, energetic brushwork with side-to-side strokes of a thin brush.
-
Drag paint from dark reflected objects quickly into the light areas, clean the brush, then drag the paint from the light areas back into the dark.
-
Watch for the bright highlights from ripples in dark areas and small dark streaks appearing in light areas.
-
Use broader brushwork with a larger flat brush
-
Slower strokes and elegant, softer edges
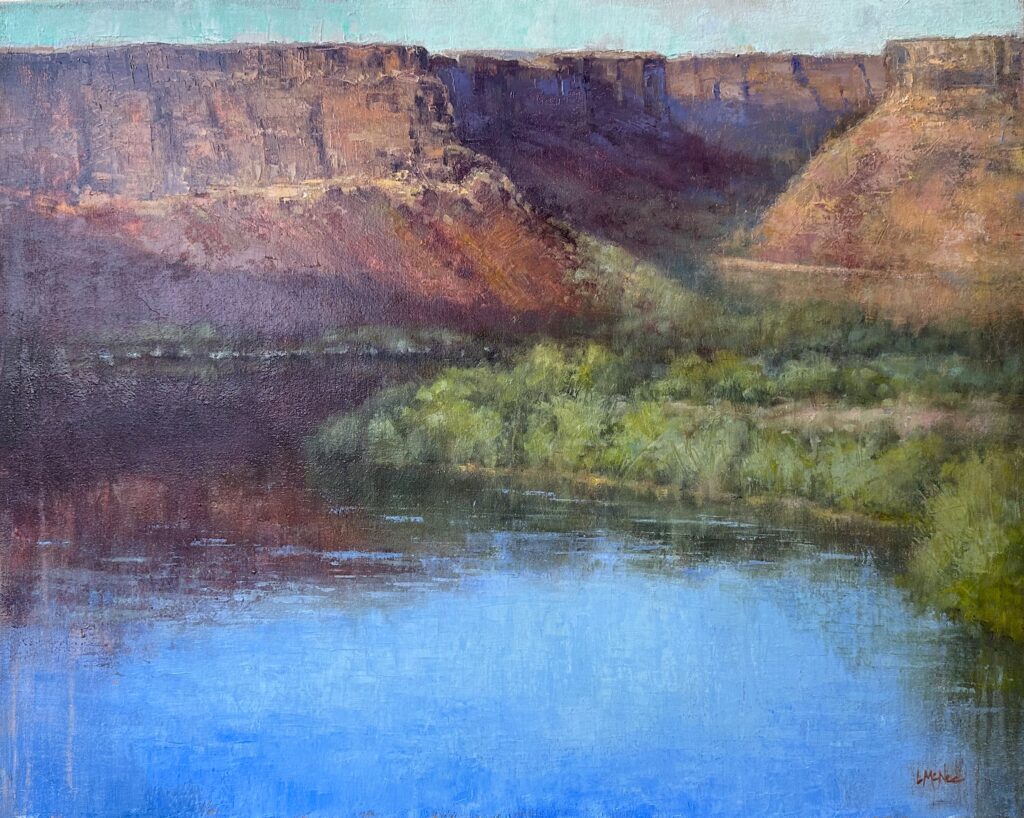
Under the water:
-
Shallow water is generally warmer in a tone that is affected by the rocks, sand, and algae underneath.
-
Lakes, rivers, and streams tend to be greener. This is caused by the sediment in the water which reflects more light.
-
A lake, river, or stream generally tends more toward green. Particles floating in the water reflect more light, creating an overall lighter tone.
-
The value of the blue-green decreases and gets darker as the water gets deeper.

The Surface of the Water:
-
The sky reflected on the surface of the water is generally a deeper version of the sky above.
-
Reflections of objects will be somewhat darker and dimmer than objects seen directly.
-
On the surface of clear water, shadow areas from objects next to the water tend to offer a window to under the surface – like wearing polarized sunglasses!
-
This is due to the object blocking the reflection of the sky.
Water Becomes Less Reflective the Closer the Viewer Is:
-
For example, calm water directly below the viewer reflects only weak images while the outlying water reflects almost as well as a mirror.
-
In murky water close to you, the overall color of the water itself is seen.
-
In clear water, the rocks and objects under the water are seen.
One trick: Gradate the reflected images in the background from light, cool, and clear to the foreground to darker and more olive green. Keep in mind, the reflected sky in the water close to you tends to look darker, grayer, and more blue-violet than in far-away water.
Understanding the Shapes & Angles Reflected in the Water:
Many new painters paint the reflected image as an exact, mirrored image of the direct object. This distorts and the realistic landscape painting requires a more accurate representation of what your eyes actually see.
-
When viewing a scene of reflections in water, you are seeing the actual objects in the scene and their reflected images from two different viewing angles.
-
Of course, the reflected image you see in the water bounces off the surface of the water.
-
However, you see the reflected scene from an angle of view as far below the surface of the water as your eyes are above the water.
-
This means you see more of the undersides of reflected objects and may even see reflected objects that you cannot see at all when you look directly at the objects.
Lastly, many painters have difficulties when they try to paint very bright highlights such as reflections of the sunset on the water. Using pure white paint and expecting the painting to look realistic is a common mistake. Observation and practice will help you paint what you see and not what you know.
Try mixing a bit of yellow or orange into white for these intense highlights. If painted accurately, the painted sunlight can appear as bright as the original reflection of the actual sun.
Also, learning how to use complementary colors and warm against cool colors will dramatically improve the glow of your paintings. Observing any one of these principles will greatly improve your painting of reflections in the water. These tips can be used for oil, acrylic, watercolor, and all other painting mediums.
*****
Learn more about ‘color’ and “value and tone’ because this will help your paintings become more believable:
The Importance of Value & Tone in Painting
Use the Hidden Meaning of Color in Your Art
A Unique Approach Using Color Harmony to Improve Your Paintings
For more information about painting water reflections check out these great sources:

Very helpful information! Thanks for sharing, Lori. I have been struggling with this technique and haven’t found too many resources that I could successfully say “I did it”. So I look forward to trying again this approach. What would be even more helpful is a demonstration illustating this technique! I love your blog which is always full of great information.
Hi Diana – I agree about the demonstration suggestion. A reader asked me for advice the night before I posted the article. Instead of answering his questions in an email, I ended up writing this post! Down the road I will try and do a demo, meanwhile I hope these tips get you started.
Best-
Lori
Really good post, i read it all. It is good informative knowledge 🙂
The information you provide is wonderful. Thank you for the fine tips. I also love your quote from Picasso…awesome thought
Thanks again
Clair
Hi Clair, I am a bit of a quote junkie and find inspiration from them. Glad you like the Picasso quote. Thanks for stopping by for a visit.
Lori 🙂
Genial post and this enter helped me alot in my college assignement. Say thank you you on your information.
Great information. Thanks so much for sharing. To be able to verbally reflect on (no pun) these concepts really shows your understanding and study of nature. What a great thing to find on the web. You really help a lot of folks with this material.
Don
Hello Don, nice to meet you here. I really appreciate your great comment. I am glad you found these tips while surfing the web and I hope you come back again.
Happy painting-
Lori
I have come across your site as an experienced woodcarver who is carving a commissioend panel with water in it. I have been carving for 20 years but am completely clueless on how to carve water but your site has made me reflect. Thanks.
Hello Bob,
It gives me great pleasure to know that my little tips are crossing into other creative avenues and helping other creative people such as yourself. Carving water must be a challenge! I hope it all goes well.
Best-
Lori
Thanks for this very helpful info, Lori. You have cleared up some things that I have been wondering about concerning painting water. I appreciate how much help you are to your fellow artists.
God bless,
Jacki
I am so grateful to hear this post has helped you Jacki! Water can be tricky. Thank you for the nice message. I really appreciate it and am happy to help others. I hope to see you again soon.
Happy painting-
Lori 🙂
Dear Lori,
I liked your information about drawing water. I was only painting the shore by mixing the colors of the sea & the sun but, i didn’t know that the depth & the reflections would change it totally into a wonderful painting. I liked the quote by the way 🙂
thank you,
A.G.
Hello Awata,
I am so glad you learned a thing or two from this article. Thanks for letting me know. Hope to see you here again someday soon.
Best-
Lori
I want to thank you on this information concerning the reflections thanks.
You are very welcome Virginia, I am glad you found this useful!
Lori 🙂
Hi Lori! I am painting a water scene (watercolour paint) with buildings in the evening, and I want to paint lights in the buildings so they can reflect on the water. How do I paint the reflected light on the water realistically?
Hello Tessa,
I hope this article is helpful to you, but it sounds like you still have some questions. Although it is difficult for me to answer your question without seeing the painting, I will try.
Remember, the object that is being reflected in the water is not an exact mirrored image. Plus, the darks of the objects will reflect a bit lighter, just as the lights will reflect a bit darker! Try turning the painting upside down and make sure you are using good reference photos.
Thank you for the comment and good luck!
Lori 🙂
Lori,
In reference to your “Sunset on water”. I have a similar problem on my oil painting that
I hope you could help me with. Mine consist of water protruding from a dark forest coming to the foreground. The sun is not visible in the painting but the some rays break thru the trees. My problem is there are three spots where the light is super intense and the rest of the light rays are not that bright and after I was finished all of the non intense light is to bright. How do I get it to not look so bright in those areas?
Thanks,
Matt
Remember we create the effects of light with warm against cool colors – not just light against dark. It is tough for me to help much more without seeing the image. If you are on FB, you can share it on my wall at http://www.facebook.com/FineArtTips and I will take a look.
Thanks Matt,
Lori
Love your blog!! Love your work!!!
Thank you Lori,
I’m tired of trying to teach myself acrylics…too often things go right or wrong without me having a complete understanding of it. Reflections are too complex for me to figure out. Your answers seem far superior to anything I have searched.
I will certainly be back!
Heather
Hello Heather! That is so good to know. I am happy this post helped you. Good luck with your painting.
Lori
Some good rules to go by here. Of course, as an artist who renders with an impressionist brush, I love to break them once in a while to keep things lively!
ronaldleeoliver.com
Yes, water and reflections can be tricky. So, some guidelines are helpful to remember.
Thanks!
Lori
Lori, I just found your blog from the Acrylic Painting Club on FB and can’t believe what a fantastic tutorial you have shared with us. I have been painting professionally for 11 years and I still get tripped up with water, coming close but missing something. I have saved this link and it is coming with me on my next plein air day! Thank you again!
Christine
hannonartworks.blogspot.com
Christine, I am so glad to know that this post is coming in handy for you. Those ‘rules’ should help you when in the field painting water. Let me know how it goes…
I ‘m painting a bayou with dark water and reflections. How can i make the water glassy and what color should the ripples be? I ‘m working with acrylics.
Hello Dale, this is not an easy question because the water colors, and ripples are depended upon the surrounding environment. Is the sky cloudy, blue or is there a sunset? This would change the water reflections and ripples. I am sure the bayou is murky and dark, but again the sky will change the color of the water. I hope this helps…
Very useful and well explained, thank you very much for sharing it with us. Regards from Spain.
Hello from Idaho! I love Spain. Glad to hear you visiting my blog and found it helpful.
Great post!
Thank you Barbara!
Hi Lori,
I was wondering if the sunset tips can be used if it were a moonlight instead of a sun? Wouldn’t the highlight be white?
Thank you for the information though!
Hello Isabelle, yes but the moonlight is cooler than the sunlight. So keep that in mind. You gave me a good idea for a post! Thanks 🙂
u re really gud, am gonna use and follow ur information very well.
fanx as well,
AM GONNA NEED MUCH TUTORIALS…
my name is Abdul Raheem Ishask Nuamah, from, Ghana……am an artist.
Hello Abdul, thank you for visiting. Good luck with you art. I hope you find lots of helpful information here.
dear Lori,
I have painted a river on the wall, I am not satisfied with the shallow water closer to the viewer. How can I get comments on what is wrong with it?
Hello Mitra, it is diffucult to help you without seeing the painting. I suggest posting it on my Facebook Page, Fine Art Tips to get some help. Hopefully this article has helped you too!